..........................................................
Beautiful Coffee Filter Roses
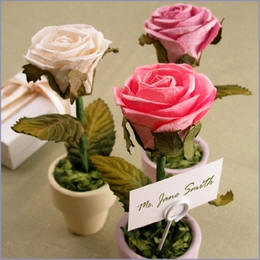
 Mommy Makes Roses makes these beautiful life-like roses!
 Paper roses are great for 1st anniversaries since it is traditional to give a gift of paper. But they always great for weddings, birthday or just because. Mommy Makes Roses has various rose & orchid kits to make your own or you can buy pre made single stems and full bouquets in many colors!
 I was lucky enough to find the full tutorial on these gorgeous creations on Martha Stewart!
........................................
Items You Will Need:
Coffee Filters, Floral Tape & Wire, Watercolors, Scissors & Rose Templates (download here).


2. Form rose. With coffee filter No. 1, take four connected petals and poke an 18-inch length of 16-gauge floral wire down through the center of the bottom of one end petal so 1/2 inch of the wire remains sandwiched between two opposite petals.
3. Wrap adjacent two petals tightly around first two petals; wrap with floral tape around base, then 1/2 inch down wire, to secure.
4. When working with floral tape, pull it as you work to expose the sticky part of the tape.
5. With coffee filter No. 2, take four connected petals and sandwich "flower bud" between two opposite petals. On the adjacent petal pair, gently tear the perforation of the base so that you have a strip of 2 side-by-side petals. Wrap this petal strip around the other two petals and secure with tape.
6. With coffee filter No. 3, take four connected petals and gently tear the perforation at the base to
create a strip of four petals. Wrap this petal strip around flower bud and secure with tape.
7. With coffee filter No. 4, gently tear the perforation at the base of petal shapes to create a strip of five petals. Wrap this petal strip around flower bud and secure with tape. (The folded petal gives rose stability and a more rounded form.)
8. With coffee filter No. 5, place three petals, overlapping slightly on rose and wrap just once (to avoid bulk) with floral tape to secure.
9. Wrap remaining three petals opposite the first three. Repeat for shapes cut from filters Nos. 6, 7, and Use finger and thumb to separate petals, creating air pockets and making petals curve outward from the base. Use 3 or 4 extra single petals to fill in holes and give a rounded shape.
10. To paint the roses, use watercolor paints, mixed with a bit of water. Paint the base color, first doing the bottom, then the top, working from the inside out. Accentuate with a darker color on the tips. Use a flat brush to apply a third color of undiluted watercolor to edges. Let dry overnight.
11. Once painted roses are dry, curl left and right sides of outer petals around a bamboo skewer to create a point. Work your way from the outside to the inside of rose. Curl inner petals just slightly by wrapping top straight down around bamboo skewer.
12. Add five paper sepals secured with floral tape to short stem. Wrap floral tape in a spiral down wire stem several times to create a thick roselike stem. Burnish stem with skewer to smooth tape. Cut 6 paper leaves and sandwich a 4-inch wire between. Use a glue stick to stick 6 leaves together with a 4-inch wire stem.
13. Secure leaves to stem with floral tape.
And woo hoo you are done!!!
 There are so many things you can do with these beautiful creations! Give them as gifts, use as center pieces, glitter them, hot glue to clips or pins and wear them, or find your own unique way to use them!

Beautiful Coffee Filter Roses


........................................
Items You Will Need:
Coffee Filters, Floral Tape & Wire, Watercolors, Scissors & Rose Templates (download here).


It's important to before you start watching the Martha video & the below video, they will greatly help you in understanding the instructions.
1. Trace and cut petal shapes through both layers of filters, as per templates.
3. Wrap adjacent two petals tightly around first two petals; wrap with floral tape around base, then 1/2 inch down wire, to secure.
4. When working with floral tape, pull it as you work to expose the sticky part of the tape.
5. With coffee filter No. 2, take four connected petals and sandwich "flower bud" between two opposite petals. On the adjacent petal pair, gently tear the perforation of the base so that you have a strip of 2 side-by-side petals. Wrap this petal strip around the other two petals and secure with tape.
6. With coffee filter No. 3, take four connected petals and gently tear the perforation at the base to
create a strip of four petals. Wrap this petal strip around flower bud and secure with tape.
7. With coffee filter No. 4, gently tear the perforation at the base of petal shapes to create a strip of five petals. Wrap this petal strip around flower bud and secure with tape. (The folded petal gives rose stability and a more rounded form.)
8. With coffee filter No. 5, place three petals, overlapping slightly on rose and wrap just once (to avoid bulk) with floral tape to secure.
9. Wrap remaining three petals opposite the first three. Repeat for shapes cut from filters Nos. 6, 7, and Use finger and thumb to separate petals, creating air pockets and making petals curve outward from the base. Use 3 or 4 extra single petals to fill in holes and give a rounded shape.
10. To paint the roses, use watercolor paints, mixed with a bit of water. Paint the base color, first doing the bottom, then the top, working from the inside out. Accentuate with a darker color on the tips. Use a flat brush to apply a third color of undiluted watercolor to edges. Let dry overnight.
11. Once painted roses are dry, curl left and right sides of outer petals around a bamboo skewer to create a point. Work your way from the outside to the inside of rose. Curl inner petals just slightly by wrapping top straight down around bamboo skewer.
12. Add five paper sepals secured with floral tape to short stem. Wrap floral tape in a spiral down wire stem several times to create a thick roselike stem. Burnish stem with skewer to smooth tape. Cut 6 paper leaves and sandwich a 4-inch wire between. Use a glue stick to stick 6 leaves together with a 4-inch wire stem.
13. Secure leaves to stem with floral tape.
And woo hoo you are done!!!